Input Director is a Windows application that lets you control multiple Windows systems using the keyboard/mouse attached to one computer. It is designed for folks who have two (or more) computers next to each other and find themselves regularly switching from one system to the other. With Input Director, you can share a single keyboard/mouse across a set of systems. You switch which system receives the input either by hotkey or by moving the cursor so that it transitions from one screen to the other (in a very similar fashion to a multi-monitor setup). The idea being that you can position the monitors from two or more systems in a row and use a shared keyboard/mouse to control all of them.
Input Director also supports a "shared" clipboard, in which you can copy data onto the clipboard on one system, transition across to another and paste.
Input Director requires Windows 2000 (Service Pack 4), Windows XP (Service Pack 2), Windows 2003, Windows Vista, Windows 2008 or Windows 7. The systems must be networked.
Download Input Director
 |
| Ver 1.3 |
|
| Ver 1.2.2 |
Install Guide for Input Director
Preamble
Before kicking off the installation and configuration of Input Director it's important to first explain the master/slave terminology used throughout the documentation and application.
The master system is the computer that has the mouse/keyboard that you be using to control it and the other system(s). A slave system is one that can receive input (keyboard and mouse) from a master.
The quickstart guide will run though setting up two computers, one as the master, the other as a slave. You need to decide now which computer you will use as the master - that is, which one has the keyboard/mouse that you want to use to control it and the other system (the slave).
For the remainder of the quickstart guide, the two Windows systems that Input Director will be installed onto will be referred to as the master and the slave.
Installing Input Director
Configuring Input Director
In summary, Input Director on the slave system needs to be configured to:
- Authorise the nominated master system to control (send input) to it
- Be enabled as a slave
- Add the slave and set an (optional) hotkey for it
- Configure the position of the slave monitor.
- Be enabled as the master
Configuring the Slave
Before you can begin the slave configuration you need to know the (host) name of your master system. If you're unsure how to look that up, instructions for how to do this are in the faq and can be located here.Authorise the nominated master system
On your nominated slave system, start Input Director by clicking on the "Input Director" icon on your desktop or via Start/All Programs/Input Director. The Input Director window has a series of tabs across the top of the window. Click on the "Slave Configuration" tab:
Click on the "Add" button and enter the name (or IP address) of the computer that will act as the master. If Input Director is unable to find the host (that is, resolve the host name) it will indicate this and either the name you have entered isn't correct or the master system isn't network accessible from the slave.
Enable Input Director as a slave
The final step is to enable Input Director in slave mode:Click back to the Main tab and depress the "Enable as Slave" button and you're done:

To confirm that Input Director is enabled in slave mode, have a look on the Windows notification bar (usually located in the bottom-right hand corner of the screen. The Input Director "ID" icon will be one of 3 colours:
 - Input Director is disabled
  - Input Director is enabled as a slave
As Input Director should now be enabled as a slave, the icon should be green:

Configuring the Master
Before you can begin the master configuration you need to know the name of your slave system. If you're unsure how to look that up, instructions for how to do this are in the faq and can be located here.
Add the slave and set an (optional) hotkey
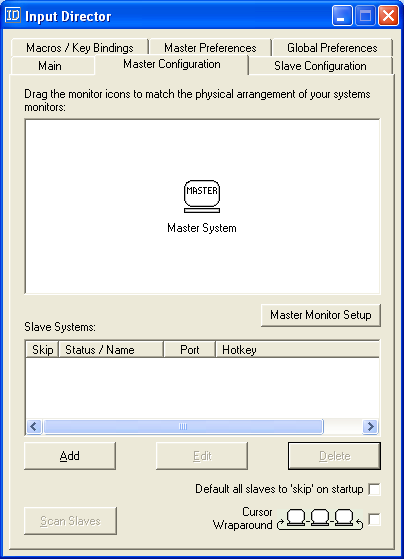
On your nominated master system, start Input Director by clicking on the "Input Director" icon on your desktop or via Start/All Programs/Input Director. The Input Director window has a series of tabs across the top of the window. Click on the "Master Configuration" tab: